How to Build a DIY Cold Frame
Gardening enthusiasts understand that providing a touch of extra protection can truly transform the experience for your plants, particularly when faced with the whims of unpredictable weather.
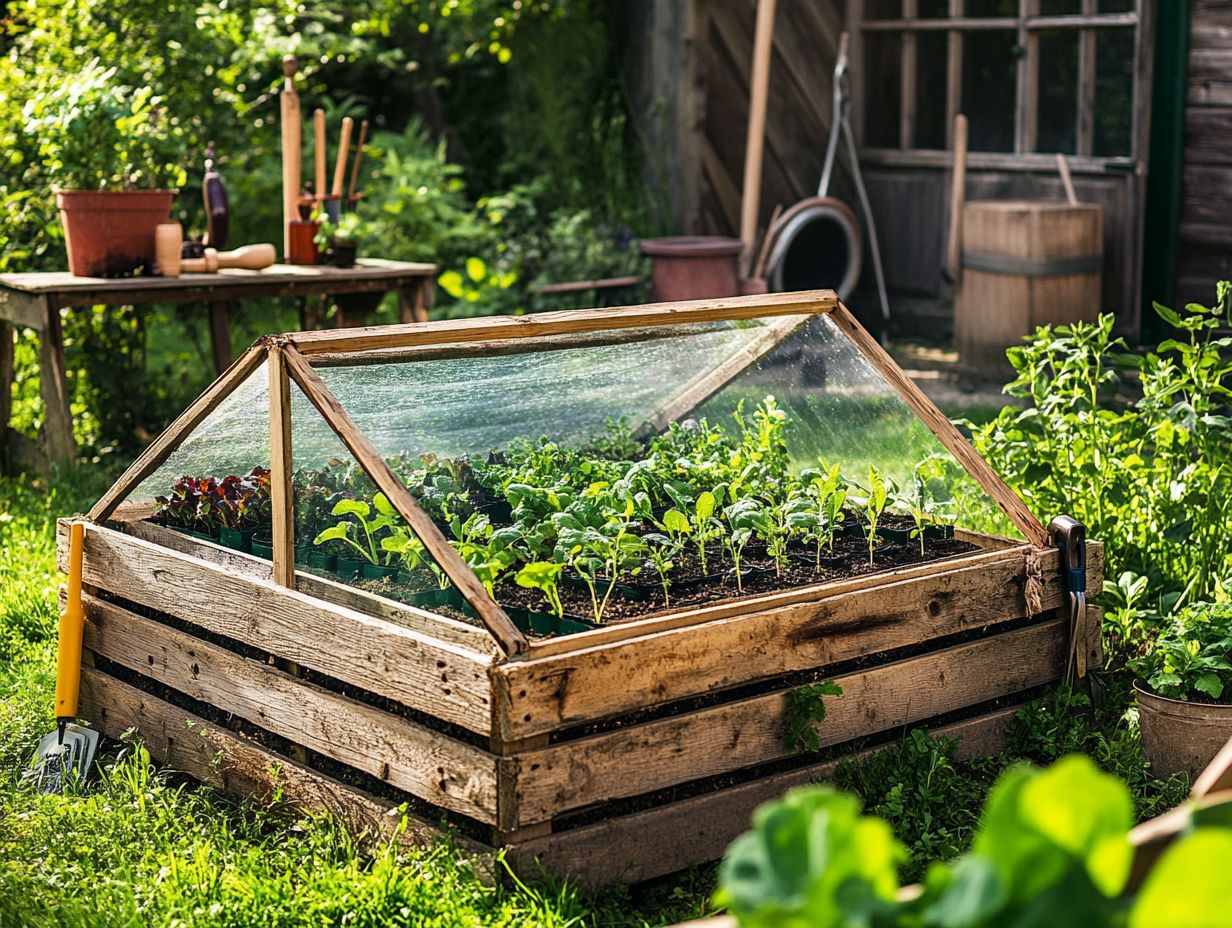
A cold frame acts as your own mini greenhouse. It enables you to extend your growing season and care for tender seedlings with ease.
Explore what a cold frame is, the advantages of constructing your own, and follow a step-by-step guide tailored to meet the unique needs of your garden.
From essential materials to thoughtful maintenance tips, this guide will empower you to cultivate a thriving garden throughout the year.
Contents
Key Takeaways:
- Save money and customize your gardening experience by building a DIY cold frame.
- Gather essential supplies and follow our step-by-step guide to construct your own cold frame.
- Consider factors like sunlight and drainage when choosing the location for your cold frame. Follow maintenance tips for successful gardening.
What is a Cold Frame?
A cold frame is an essential gardening tool that safeguards your plants during winter by creating a controlled environment. For anyone passionate about winter gardening, it becomes an invaluable asset.
Typically crafted from materials like reclaimed windows, PVC, or even straw bales, it functions as a miniature greenhouse where vegetables such as carrots, kale, and lettuce can flourish despite the chill.
Gardening experts like Niki Jabbour and Kevin Espiritu highlight the significance of constructing your own DIY cold frame. This helps you to extend your growing season and elevate your vegetable gardening endeavors.
Definition and Purpose
The cold frame plays a crucial role in your gardening endeavors. It allows you to extend your growing season, especially during the winter months.
It creates a protective environment for your young plants, shielding them from bad weather.
Think of it as a mini-greenhouse that maintains a cozy temperature inside. It guards fragile seedlings against frost, wind, and heavy snowfall.
With a cold frame in your arsenal, you can cultivate tender vegetables and flowers well before the last frost date. This promotes earlier growth and enables the transplanting of robust plants.
Its transparent cover lets sunlight flood in, creating a greenhouse effect that nurtures your plants’ development. This makes the cold frame an invaluable tool for any gardening enthusiast eager to maximize yield, even in challenging climates.
Benefits of Building a DIY Cold Frame
Building your own cold frame is an exciting adventure that brings numerous benefits, particularly if you’re passionate about winter gardening.
Crafting your own cold frame can lead to substantial cost savings compared to buying pre-made options. You can also customize your design to perfectly align with your unique gardening needs.
Utilizing materials such as salvaged windows or cinderblocks, you can construct an insulated cold frame specifically designed to protect your plants and prolong the growing season.
Cost Savings and Customization
One of the primary benefits of constructing a DIY cold frame is the significant cost savings it provides. This enables you to make use of readily available materials while crafting a design that aligns with your specific needs.
This approach not only makes your gardening endeavors more economical, but it also empowers you to customize your projects according to your personal preferences and gardening style.
If you have a fondness for a rustic aesthetic, you might opt for reclaimed wood. In contrast, someone with a contemporary taste may choose sleek, modern materials.
Adjusting the dimensions and height of your cold frame allows you to accommodate a range of plants, from delicate seedlings to robust herbs.
By incorporating features like adjustable lids or enhanced insulation, you can further optimize plant growth while taking full advantage of seasonal variations.
Ultimately, the flexibility inherent in DIY projects transforms your gardening experience into a truly personalized journey.
Materials and Tools Needed
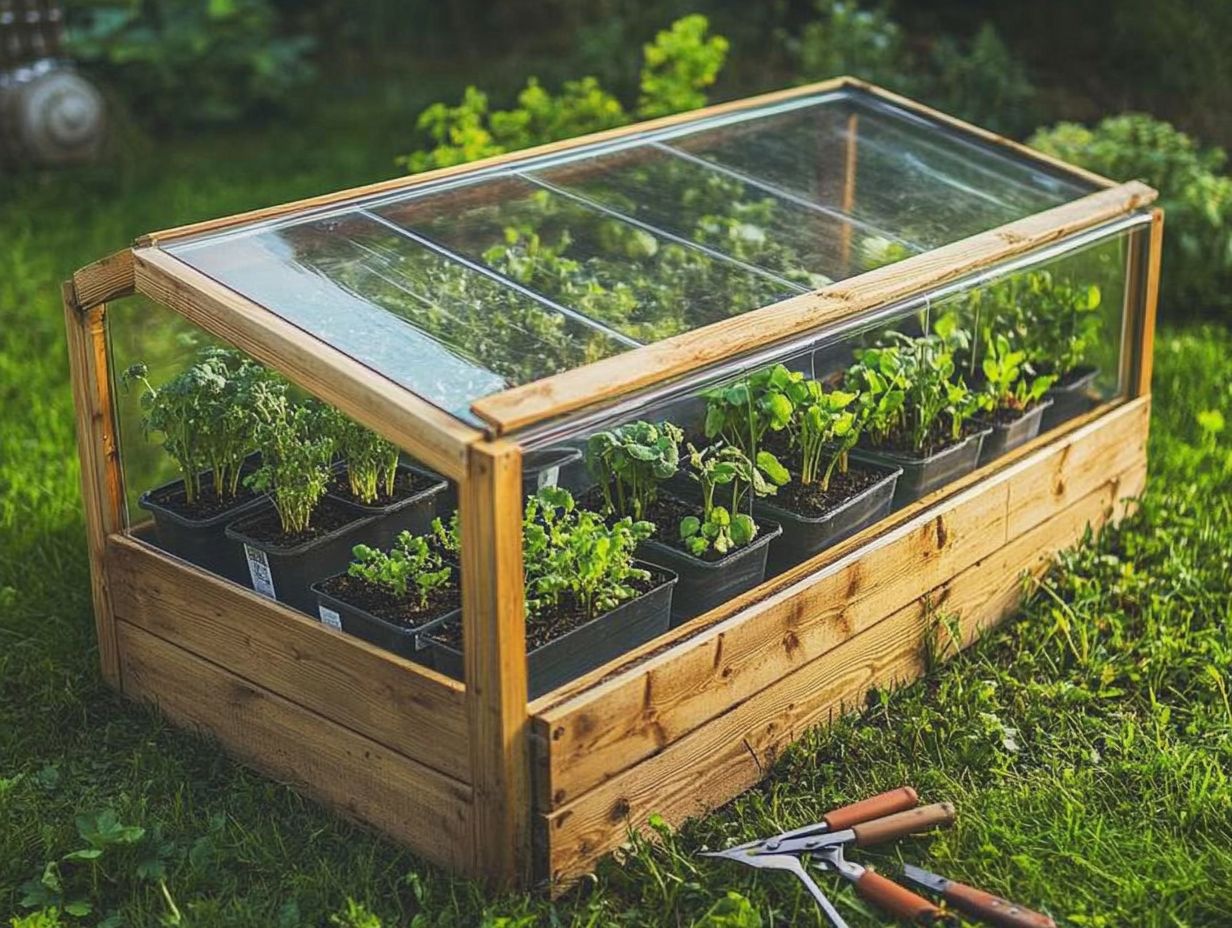
Get ready to build your very own cold frame! Choosing the right materials will help your winter garden thrive, and knowing how to use cold frames effectively can make all the difference.
Use common materials like plastic sheeting, acrylic, or even old window panes. For tools, gather basic carpentry hardware and PVC for added strength and proper ventilation.
The right materials are crucial for effective ventilation. This is vital for keeping the temperature and humidity at optimal levels.
Essential Supplies for Construction
To build your cold frame, you need supplies like PVC, plastic sheeting, and window panes. These will create a sturdy and functional structure for your plants.
A strong base made from wood or bricks ensures stability and insulation. Gather tools like a saw, screwdriver, and measuring tape for precise cuts and assembly.
Add hinges for the lid to make access easy and improve ventilation. Choose clear materials to let sunlight in while protecting your plants from bad weather.
Step-by-Step Guide to Building a Cold Frame
This step-by-step guide will help you build a simple cold frame that protects your winter garden. You’ll learn the essential actions needed for a successful project.
Whether you use recycled materials or a new design, building a DIY cold frame is easy. For detailed instructions, check out how to create a cold-frame for gardening. Follow these gardening tips for the best results, ensuring a nurturing space for vibrant vegetables like broccoli and arugula!
Instructions and Tips
Follow clear instructions and practical tips to make your cold frame construction easy and durable. First, choose a sunny location sheltered from harsh winds.
Use weather-resistant materials like treated wood or PVC to make your frame last. Be sure to include ventilation in your design it’s key to regulating temperature!
Wear gloves and goggles for safety while building. After assembly, regular maintenance is essential. Check for damage and keep the glass clean to maximize sunlight.
With these considerations, you’ll create a small, controlled climate that helps your plants thrive earlier in the season!
Choosing the Right Location for Your Cold Frame
Finding the best spot for your cold frame is crucial. Factors like sunlight exposure, wind protection, and easy access for maintenance matter greatly.
Place your cold frame in a south-facing area of your garden for maximum sunlight, essential for nurturing vegetables during colder months. Nearby structures can also protect against wind, ensuring the cold frame operates at its best.
Factors to Consider
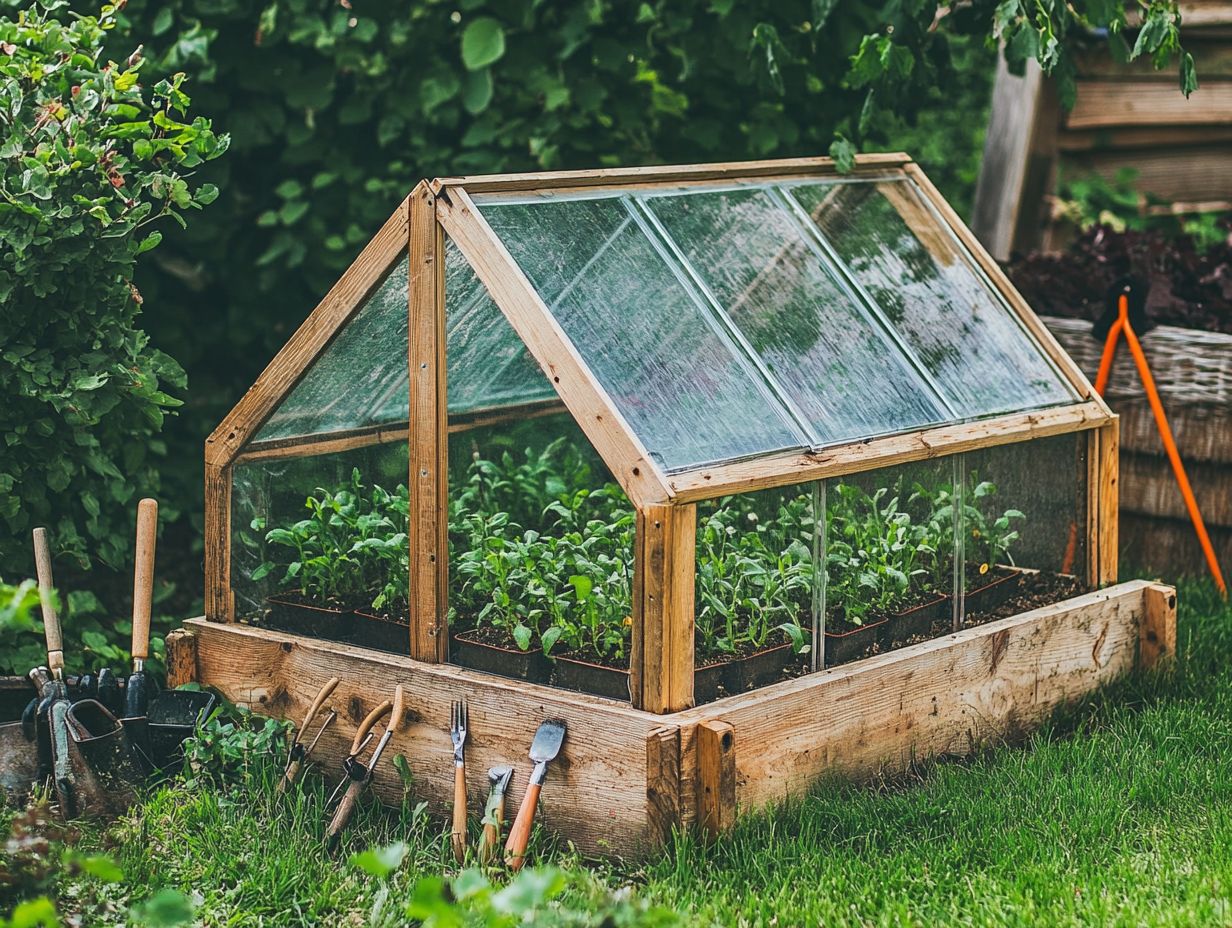
Several key factors should inform your choice of location for your cold frame, particularly the amount of sunlight it will receive and the degree of protection it offers from harsh winds.
Selecting the right spot is crucial, as it not only affects the immediate temperature inside the cold frame but also shapes the overall growth environment for your plants. A location bathed in sunlight will help maintain warmer temperatures during the colder months, fostering healthy growth. While a bit of shade can be advantageous during peak heat to prevent overheating, too much shade may stifle growth altogether.
Safeguarding your cold frame from strong winds is vital. Those gusts can disrupt the delicate microclimate within, potentially harming fragile seedlings and causing temperature fluctuations that impede their development.
Using Your DIY Cold Frame
Once your DIY cold frame is constructed, understanding how to utilize it effectively can lead to a thriving winter garden brimming with vibrant vegetables.
Essential gardening strategies involve keeping a close eye on the temperature, ensuring proper ventilation, and choosing the right plants to nurture within your cold frame. Consider opting for popular selections like beets, lettuce, and other resilient vegetables that flourish in cooler climates. This maximizes the benefits of the controlled environment you’ve created.
Tips for Successful Gardening with DIY Gardening Tips
To cultivate a successful garden within your cold frame, specific tips and strategies can significantly enhance your results and elevate plant health.
Choosing the right plants is paramount; you ll find that leafy greens such as kale and Swiss chard, along with herbs and hardy vegetables like spinach and carrots, tend to flourish in cooler conditions.
Temperature management is also crucial make it a habit to monitor the internal climate regularly, utilizing thermometers to prevent overheating on sunny days.
For optimal results, consider adding a layer of insulation, such as bubble wrap, to help retain warmth when temperatures dip. Regular maintenance practices, including cleaning the glass panels and ensuring proper drainage, will bolster plant growth while shielding them from pesky intruders.
By concentrating on these essential areas, you can create a thriving mini-ecosystem within your cold frame, turning your gardening ambitions into a flourishing reality.
Maintenance and Care of Your Cold Frame
Keep your acrylic cold frame in top shape to ensure your plants thrive all winter long!
Engaging in simple practices, such as inspecting for structural integrity, cleaning the plastic sheeting or acrylic, and ensuring proper ventilation, will help keep your cold frame in optimal condition throughout the chilly months.
Monitoring the internal environment is crucial for the health of your plants, guaranteeing they receive the sunlight and warmth they need to thrive.
How to Keep Your Cold Frame in Good Condition
To keep your cold frame in optimal condition, regular inspections and maintenance practices are essential for ensuring its effectiveness and the vitality of your plants.
Taking the time to check for any leaks in the structure is paramount; even the slightest gaps can create temperature fluctuations that could jeopardize your plants. It’s equally vital to clean the cover materials, as dirt and debris can obstruct sunlight, ultimately limiting photosynthesis.
Ensuring proper ventilation will aid in regulating humidity levels, preventing the unwelcome growth of mold and mildew within the frame. By incorporating these maintenance practices, you can significantly enhance the longevity of your cold frame while nurturing an environment where your plants can truly thrive.
Frequently Asked Questions
If you have more questions or tips to share, feel free to ask!
Can I build a DIY cold frame without any prior experience or special tools?
Yes! Building a DIY cold frame is a simple project. With basic tools and materials, anyone can build one successfully.
What materials do I need to build a DIY cold frame?
Gather a few essential materials like wood, screws, hinges, clear plastic sheeting, and a staple gun. You can even repurpose old windows or doors for the frame!
How big should my DIY cold frame be?
The size depends on your available space and the plants you want to grow. Aim for a cold frame that is at least 2 feet wide and 4 feet long to accommodate various plants.
What is the best location for a DIY cold frame?
Place your cold frame in a sunny spot facing south. This maximizes sunlight exposure while sheltering it from strong winds. Consider placing it near a building or fence for added protection!
Do I need any special tools to build a DIY cold frame?
No special tools are needed! A power drill and a saw can make the process easier, but you can also use a hammer and nails if that’s all you have. You can also enhance your design using PVC pipes.
What can I grow in a DIY cold frame?
A DIY cold frame is perfect for cool-season vegetables like lettuce, spinach, and kale. You can also start seedlings or extend the growing season for certain crops.


